Compilation of Painting Tips!
By: A Cat Eye Girl - 11/14/2011
|
|
Every now and then one of our customers will ask us about painting furniture, as in “how do you paint furniture?” They tend to be looking for painting tips as well as a little vote of confidence to strike out and paint something for themselves.
Here’s a compilation of painting tips:
- Take the fifteen minutes it takes and remove any hardware like drawer pulls and hinges.
- Lightly sand the existing finish (paint, varnish, lacquer, polyurethane et al) before priming with 220 grit sand paper. Sanding creates a surface for primer and paint to “hold” onto. Paint won’t bond to a shiny surface, therefore your efforts won’t last.
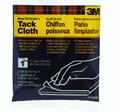
 Before painting, use a tact cloth to wipe up any remaining sanding dust. Before painting, use a tact cloth to wipe up any remaining sanding dust.
- Fill holes with wood filler and set any nails with a nail set.
- When you buy primer have it tinted to match the paint color you are using. Most paint stores will tint primer at no additional cost.
- Sand any runs in existing finish before you start. Not doing so only exacerbates the problem when you apply additional coats of paint.
- Prime everything with two coats of tinted primer, it will make your paint go farther – saving you money. Primer cost about a third less than paint.
- Multiple coats of paint is better than one heavy application.
- Treat any stain that bleeds through the primer or paint with a spray can of oil based Kilz Primer / Sealer. Spray the bleed after the last applied coat of primer or paint is completely dry. Resume priming or painting after the sprayed on primer is completely dry, usually an hour. Finishes that tend to bleed are typically stained fruitwood that in color looks similar to a finished ribbon Mahogany
 , minus the ribbons. , minus the ribbons.
- Wire brushes clean paint brushes better than any other tool and save a lot of water. Brush the bristles of the paint brush downward with a wire brush under a little stream of running water before you clean the brush with soap and hot water.
- High gloss paint works for indoor and outdoor furniture and wears like iron.
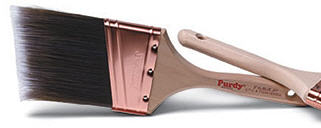
- A high quality paint brush IS the right tool.
- When painting the side of a cabinet or door trim in your home – any vertical surface -- the last brush stroke is always up. The brushes’ job is to apply and level the paint, then gravity takes over . . . hence, last stroke pulls the paint up and gravity will level it. This technique helps prevent runs. (The opposite is true if you are using a roller, the last stroke is down.)
- If you are learning how to cut in to a molding, crown or base for example, set your brush and pull towards you while looking at where the brush is going, not where it is. The faster you can pull the brush the straighter the line will be . . . after lots of practice that is. This technique takes practice and once you’ve mastered it will last a lifetime and make every painting project that includes ceilings, walls and moldings heretofore easier!
Happy painting . . . tips to share? Click here.
|
 |
| Back to Category List |
|
Email the cateyegirls
|
|
|
Our "vintage" trade secrets (more)
Funky Junk, Vintage Elements and Antiques Repurposed (more)
Antique Shows, Vintage Markets, Funky Junk Shows (more)
What We're Thinking About (more)
Sources of Inspiration (more)
Resources (more)
Estate Sale: Yakima, Richland, Pasco, Kennewick, Ellensburg (more)
|

|
|
Less is usually more, though when you are recycling and repurposing, more is, well, actually more!
We'll get farther, collect and share more ideas for using funky junk in new ways, provide more funky junk inspiration, salvage more funky junk, repurpose more funky junk and recycle more funky junk if we do it together!
Do share. And, if you've learned a funky junk thing or two or found a little funky junk inspiration by what you read here . . .
Follow us on facebook . . . Subscribe to our blog, wear cat eye glasses . . . attend a vintage market and find even more inspiration! | |
|


